-
 Phone:
 -
 Email:

chain link fence installation
Chain Link Fence Installation A Comprehensive Guide
Installing a chain link fence is a practical solution for both residential and commercial properties. This type of fencing is known for its durability, affordability, and low maintenance requirements. Whether you need to secure your backyard, define property boundaries, or enclose a commercial site, a chain link fence offers versatility and strength. Here’s a step-by-step guide to help you through the installation process.
Step 1 Planning and Measurement
Before you begin, it’s important to plan your fence layout carefully. Start by measuring the area where the fence will be installed. Use stakes and string to outline the perimeter, ensuring you account for any gates or entrances you wish to include. Additionally, verify local regulations or homeowners association rules regarding fence height and placement to avoid any compliance issues.
Step 2 Gather Materials
Once you have your measurements, gather all necessary materials and tools. You will need chain link fabric, terminal posts, line posts, concrete mix, top rail, tension bands, and gate hardware. Tools required include a post hole digger, a level, a tape measure, and a power drill. Make sure to choose high-quality materials to ensure the longevity of your fence.
Step 3 Install the Posts
chain link fence installation
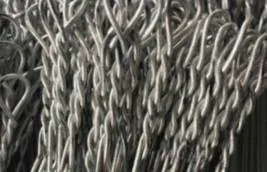
Begin your installation by marking the locations for the posts, typically spaced 5 to 10 feet apart, depending on the height of the fence. Use the post hole digger to create holes that are about one-third the length of the posts. Place terminal posts at the corners and any gate locations, then set them in the holes and fill with concrete for stability. Ensure everything is level and aligned properly.
Step 4 Attach the Chain Link Fabric
Once the posts have cured, it’s time to attach the chain link fabric. Unroll the fabric along the fence line, securing one end to a terminal post. Use tension bands and a tension wire to keep the fabric taut as you attach it to the line posts with wire ties. This step is essential for maintaining the fence’s strength and appearance.
Step 5 Finishing Touches
After the fabric is secured, install the top rail by connecting it between the terminal posts and clamping it to the line posts. Finally, install any desired gates using appropriate hinges and latches. Check the entire fence for any tight spots or loose areas, making adjustments as necessary.
Conclusion
Installing a chain link fence can be a rewarding DIY project that enhances both the security and aesthetics of your property. With proper planning, good quality materials, and careful execution, you’ll have a durable fence that serves its purpose for years to come. Enjoy your newfound privacy and peace of mind!
-
Wire Mesh for Every Need: A Practical SolutionNewsJul.25,2025
-
Steel Fences: Durable, Secure, and Stylish OptionsNewsJul.25,2025
-
Roll Top Fencing: A Smart Solution for Safety and SecurityNewsJul.25,2025
-
Cattle Farm Fencing Solutions for Maximum SecurityNewsJul.25,2025
-
Affordable Iron Binding Wire SolutionsNewsJul.25,2025
-
Affordable Galvanized Wire SolutionsNewsJul.25,2025
-
Wire Hanger Recycling IdeasNewsJul.25,2025

